


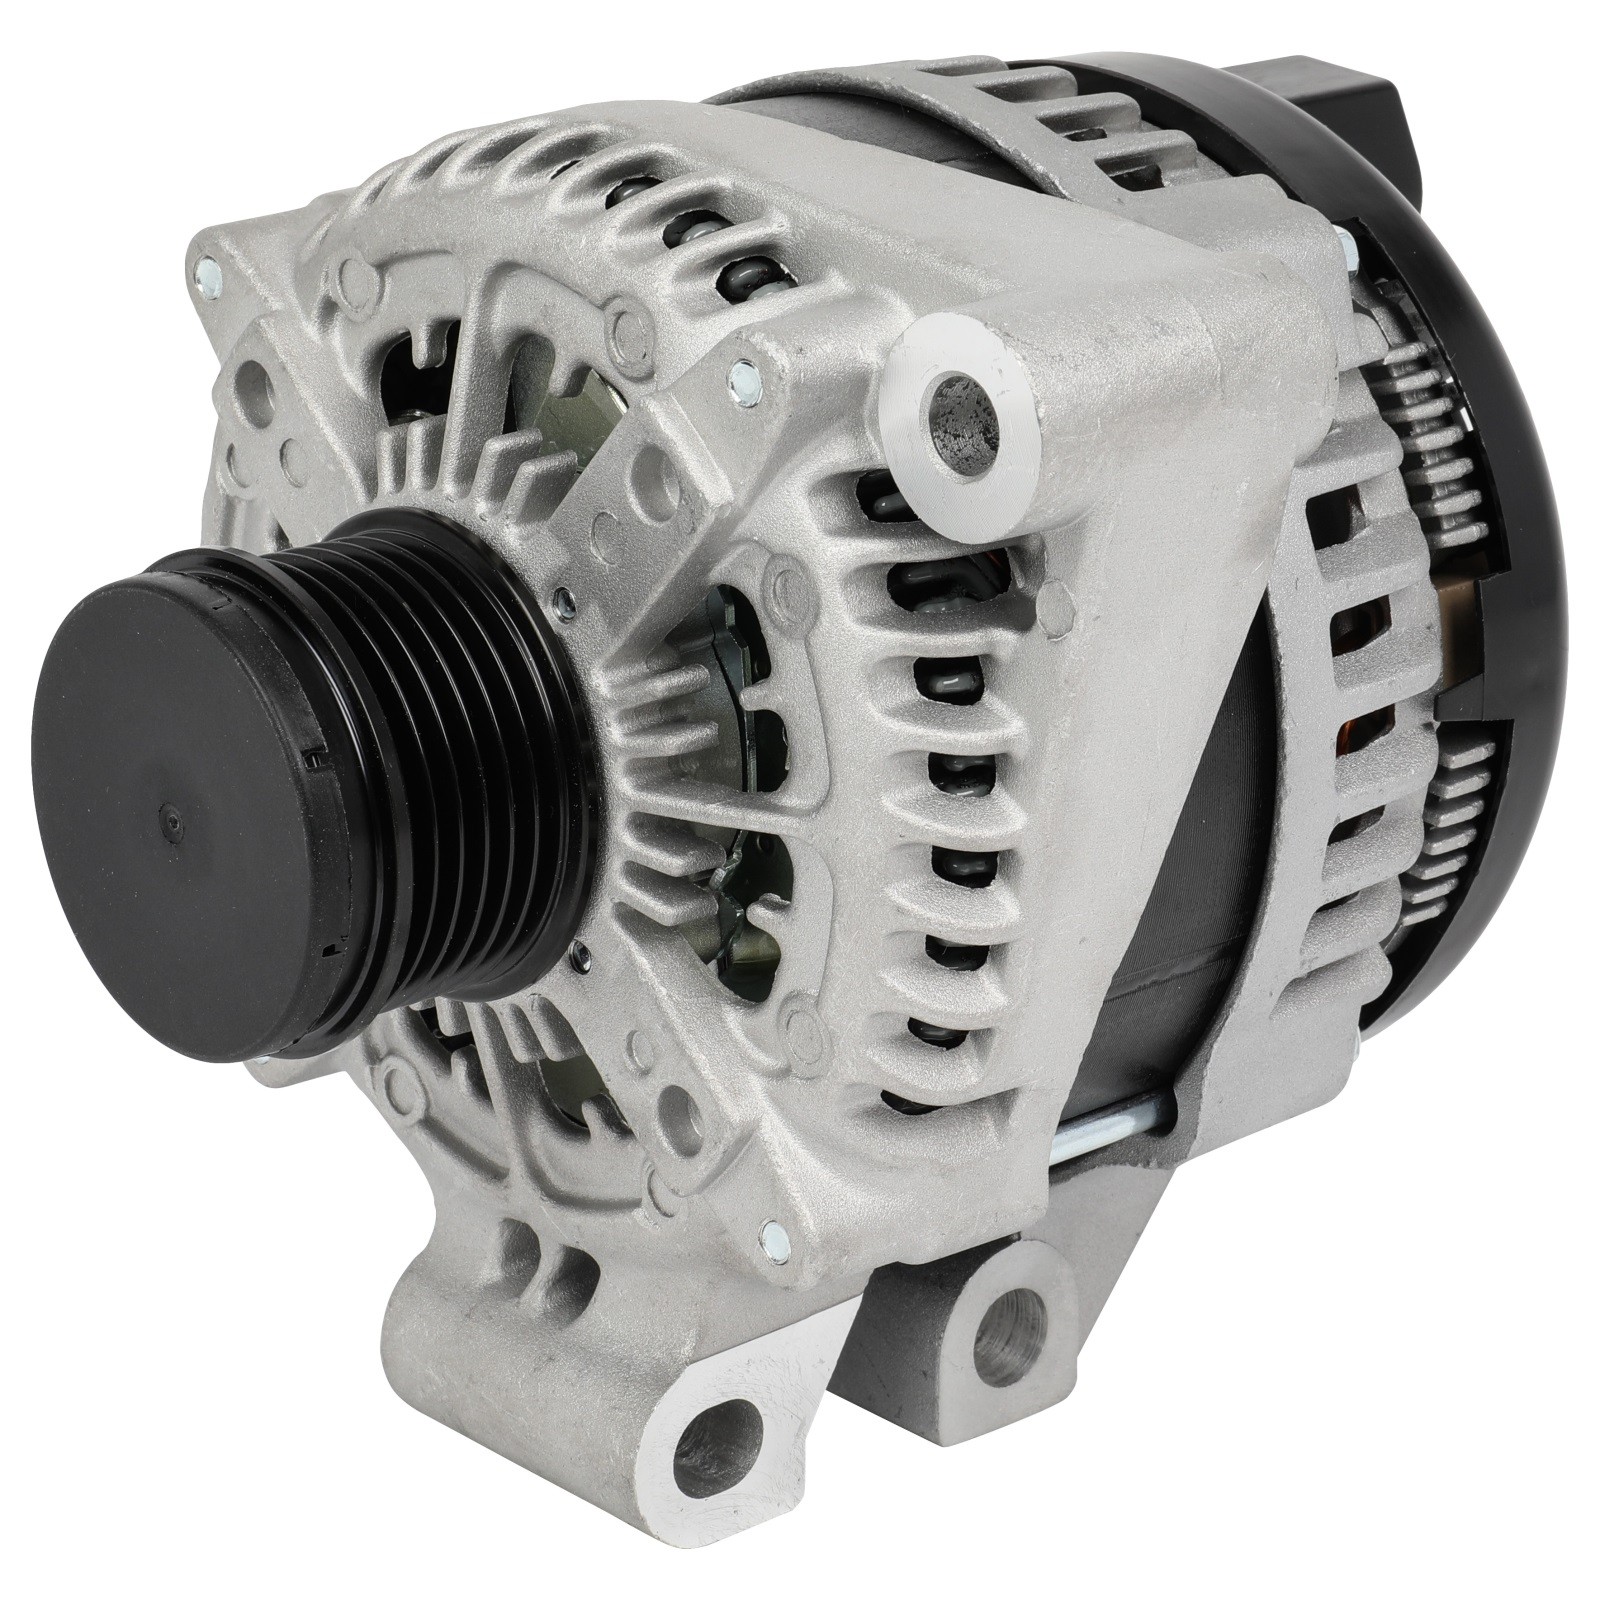
Alternator For Cadillac CTS 2008-2009 V6 3.6L 150A 12V CW 6-Groove Pulley 11369N
$ 56.91
Description
About the Product AC Service Tap:No Amperage Rating:150A Brushless:No Cooling Method:Air Decoupled Or Clutch Pulley:No Fan Type:IF One Wire Capable:No Outside Pulley Diameter (mm):58 Plug Clock:1 Polarity:Negative Belt Type:Serpentine Belt Pulley Groove Quantity:6 Pulley Included:Yes Pulley Type:Conventional Regulator Type:IR Rotation Direction:CW Voltage:12V Pulley Class:S6 Symptoms of Alternator Alternator For Cadillac CTS 2008-2009 V6 3.6L 150A 12V CW 6-Groove Pulley 11369N About the Product AC Service Tap:No Amperage Rating:150A Brushless:No Cooling Method:Air Decoupled Or Clutch Pulley:No Fan Type:IF One Wire Capable:No Outside Pulley Diameter (mm):58 Plug Clock:1 Polarity:Negative Belt Type:Serpentine Belt Pulley Groove Quantity:6 Pulley Included:Yes Pulley Type:Conventional Regulator Type:IR Rotation Direction:CW Voltage:12V Pulley Class:S6 Symptoms of Alternator Alternators usually do not require much attention unless they are worn out. Most of them last between 7 to 10 years in optimum conditions. However, there are several ways to tell if your alternator is exhausted. Battery needing a constant boost. If you constantly need to boost your battery, it could be the sign of your alternator needing replacement as it fails to recharge the battery. Difficult to Start. If your car stalls, there can be various causes, but a bad alternator could be one of them. If your vehicle can't get the electricity from your alternator, it cannot run so it stalls. Dim lights. The most common cause of dim lights from your dashboard is due to a faulty alternator. Delaying Electrical Accessories. If your electrical accessories are moving slower, then it can be a sign that your alternator is bad. Part Number 11369N, 11369, 104210-5390, 10396863, 90-29-5713 Fit for Cadillac CTS 2008-2009 V6 3.6L DOHC 150 Amp/12 Volt, CW Step By Step to Replace the Alternator Disconnect the battery. Find the right socket to loosen the bolt that keeps the cable on the negative terminal tight. It’s the terminal of the battery with a visible (-) sign. Once it’s loose, slide the cable off the terminal to disconnect the battery. Never work in the engine bay of a vehicle without first disconnecting the battery for safety. Remove the main power cable from the alternator. The main power cable will be the thick cable attached to the alternator that runs from the battery. Depending on how much space you have in your specific vehicle, you may be able to use a ratchet, but in some, you may only be able to fit an open-ended wrench. Unscrew the bolt holding it in place and pull it from where it’s connected. Release the safety clip connecting the wiring harness. The only other wiring heading into the alternator is the control harness. Use your finger or a flat head screwdriver to release the clip holding the harness together, then slide it apart. Relieve tension on the belt with the auto-tensioner (if equipped). Some vehicles use the alternator itself to apply tension to the serpentine or accessory belt, but others use an auto tensioner pulley. Insert the square drive from a breaker bar into the hole in the auto-tensioner pulley and apply pressure in a clockwise direction to relieve tension on the belt. Loosen the bolts on the alternator if there is no auto-tensioner. In cars without an auto-tensioner pulley, you can relieve the tension on the belt simply by loosening the two bolts that secure the alternator to the engine. These will often require a 14mm or 1⁄2 inch (1.3 cm) socket, though you may need to try others. Inspect the serpentine belt for damage. Look for signs of glossing or glazing (shinier portions) on the edges and underside of the belt. Inspect both the top and underside for signs of cracking as well. If you find any of those issues, you’ll need to replace it. Remove the alternator from the engine bay. With the belt pulled off of the alternator pulley and the wires disconnected, the alternator should come out freely. Compare the new alternator to the old one. Before installing the new alternator, set it down on a table next to the old one you just removed. Make sure the mounting holes and wire connectors are in the same place and that the two parts are the same size. Slide the new alternator into place. You might have to wiggle the alternator around to squeeze it back into place in a crowded engine bay. Be sure to hold loose wires or the serpentine belt out of the way as you get it into place. Insert the mounting bolts. Slide the mounting bolts through the alternator and into the mounting bracket. Tighten them by hand until they’re snug. In cars with an auto-tensioner pulley, you can completely tighten the bolts at this point, otherwise keep the bolts loose. Run the belt over the new alternator pulley. Either install the new belt or run the old belt back through all of the appropriate pulleys. If you aren’t sure how to properly route the belt, look for a diagram on the body of the car inside the engine bay to guide you. The belt will need to go around any accessories it is supposed to power in your specific vehicle. Tighten the bolts and the belt. With tension on the belt applied via the alternator and pry bar, use the appropriate socket and a ratchet to tighten the two mounting bolts up the rest of the way. This will allow the alternator to keep the tension on the belt. Connect the power cable and monitor harness. Reconnect the wire harness and insert the bolt that secures the main power cable to the alternator in the same order you removed them. They should install exactly as they were in the old alternator. Reconnect the battery. With the new alternator in place, all you have left to do is reconnect the negative lead to the battery. Make sure you tighten it firmly so it can’t shake loose while driving. Item Specifics Brand Quality_autoparts Manufacturer Part Number Q11947001LA OE/OEM Part Number 11369N, 11369, 104210-5390 Interchange Part Number 10396863, 90-29-5713 Superseded Part Number 10396863, 90-29-5713 Type Alternator Voltage 12V Amperage 150A Manufacturer Warranty 1 Year Performance Part No Country of Origin Unknown Finish Painted Universal Fitment No Vintage Part No California Prop 65 Warning Yes Pulley Groove Quantity 6 Fan Type IF Regulator Type IR Belt Type Serpentine Belt Pulley Class S6 Pulley Included Yes Decoupled Or Clutch Pulley No Brushless No One Wire Capable No Plug Clock 1 Polarity Negative Fitment Type Direct Replacement Pulley Type Conventional Outside Pulley Diameter (mm) 58 Payment Immediate payment is required during checkout. We will process and ship orders once checkout is completed. Shipping We offer international shipping through eBay global shipping program.We reserve the right to change shipping carrier and shipping method for efficient and on-time deliveries. Our store is not responsible for carrier delays such as weather or natural disasters. Returns To receive an RMA Please contact Our Customer Service.
All returned products will be inspected. Returns processing may take up to 3 business days from the time your product is received at our return facility locations. Contact Us You may Contact Us by locating the "Contact Seller" Button within a listing. Feedback We maintain high standards of excellence and strive for hundred percent customer satisfaction. Feedback is very important to us. We hope that you contact us immediately before you give neutral or negative feedback, so that we can address your concerns. It is impossible to address issues if we do not know about them! DESCRIPTION PAYMENT SHIPPING RETURN POLICY CONTACT US Shop Category Store Home Alternator sensor Steering Rack Catalytic Converter Transmission Oil Filter engine mount Starter Drive shaft Other Hot Item Alternator 125A for Nissan Murano SE Sport Utility 3.5L 2003-2006 2007 AHI0027 USD 71.12 Alternator 13747 For Lexus ES300 V6 3.0L 1997-2001 Toyota Camry Solara 2000-2003 USD 75.60 Alternator for 2011-2014 Dodge Avenger,2011-2016 Journey Grand Caravan 3.6L USD 83.49 Alternator fits 2010-2013 Hyundai Sonata 11-13 Kia Optima 2.4L 37300-2G150 11491 USD 109.12 150A Alternator for Infiniti G37 2008-2010 G35 M35 Q50 Q70 Nissan 370Z 3.5L 3.7L USD 121.25 Excellent Delivery Help & Info Payment Policy Shipping Policy Return Policy FAQ About Us New List Item Driveshaft For Dodge Sprinter 2500 3500 Freightliner Mercedes-Benz Sprinter RWD USD 405.99 Front Driveshaft For Dodge Ram 2500 3500 2003-2009 5.7L 5.9L Manual Trans 659539 USD 153.39 Driveshaft For Honda CR-V 1997 1998 1999 2000 2001 L4 2.0L Rear 4WD 936-003 USD 145.67 Rear Driveshaft For Subaru Forester 2009-2012 2.5L Rear Automatic Trans 936-902 USD 176.06 Drive shaft For Hummer H3 2006-2010 H3T 09-10 Sport Utility Front 4WD 938-008 USD 99.37 Alternator For Cadillac CTS 2008-2009 V6 3.6L 150A 12V CW 6-Groove Pulley 11369N About the Product AC Service Tap:No Amperage Rating:150A Brushless:No Cooling Method:Air Decoupled Or Clutch Pulley:No Fan Type:IF One Wire Capable:No Outside Pulley Diameter (mm):58 Plug Clock:1 Polarity:Negative Belt Type:Serpentine Belt Pulley Groove Quantity:6 Pulley Included:Yes Pulley Type:Conventional Regulator Type:IR Rotation Direction:CW Voltage:12V Pulley Class:S6 Symptoms of Alternator Alternators usually do not require much attention unless they are worn out. Most of them last between 7 to 10 years in optimum conditions. However, there are several ways to tell if your alternator is exhausted. Battery needing a constant boost. If you constantly need to boost your battery, it could be the sign of your alternator needing replacement as it fails to recharge the battery. Difficult to Start. If your car stalls, there can be various causes, but a bad alternator could be one of them. If your vehicle can't get the electricity from your alternator, it cannot run so it stalls. Dim lights. The most common cause of dim lights from your dashboard is due to a faulty alternator. Delaying Electrical Accessories. If your electrical accessories are moving slower, then it can be a sign that your alternator is bad. Part Number 11369N, 11369, 104210-5390, 10396863, 90-29-5713 Fit for Cadillac CTS 2008-2009 V6 3.6L DOHC 150 Amp/12 Volt, CW Step By Step to Replace the Alternator Disconnect the battery. Find the right socket to loosen the bolt that keeps the cable on the negative terminal tight. It’s the terminal of the battery with a visible (-) sign. Once it’s loose, slide the cable off the terminal to disconnect the battery. Never work in the engine bay of a vehicle without first disconnecting the battery for safety. Remove the main power cable from the alternator. The main power cable will be the thick cable attached to the alternator that runs from the battery. Depending on how much space you have in your specific vehicle, you may be able to use a ratchet, but in some, you may only be able to fit an open-ended wrench. Unscrew the bolt holding it in place and pull it from where it’s connected. Release the safety clip connecting the wiring harness. The only other wiring heading into the alternator is the control harness. Use your finger or a flat head screwdriver to release the clip holding the harness together, then slide it apart. Relieve tension on the belt with the auto-tensioner (if equipped). Some vehicles use the alternator itself to apply tension to the serpentine or accessory belt, but others use an auto tensioner pulley. Insert the square drive from a breaker bar into the hole in the auto-tensioner pulley and apply pressure in a clockwise direction to relieve tension on the belt. Loosen the bolts on the alternator if there is no auto-tensioner. In cars without an auto-tensioner pulley, you can relieve the tension on the belt simply by loosening the two bolts that secure the alternator to the engine. These will often require a 14mm or 1⁄2 inch (1.3 cm) socket, though you may need to try others. Inspect the serpentine belt for damage. Look for signs of glossing or glazing (shinier portions) on the edges and underside of the belt. Inspect both the top and underside for signs of cracking as well. If you find any of those issues, you’ll need to replace it. Remove the alternator from the engine bay. With the belt pulled off of the alternator pulley and the wires disconnected, the alternator should come out freely. Compare the new alternator to the old one. Before installing the new alternator, set it down on a table next to the old one you just removed. Make sure the mounting holes and wire connectors are in the same place and that the two parts are the same size. Slide the new alternator into place. You might have to wiggle the alternator around to squeeze it back into place in a crowded engine bay. Be sure to hold loose wires or the serpentine belt out of the way as you get it into place. Insert the mounting bolts. Slide the mounting bolts through the alternator and into the mounting bracket. Tighten them by hand until they’re snug. In cars with an auto-tensioner pulley, you can completely tighten the bolts at this point, otherwise keep the bolts loose. Run the belt over the new alternator pulley. Either install the new belt or run the old belt back through all of the appropriate pulleys. If you aren’t sure how to properly route the belt, look for a diagram on the body of the car inside the engine bay to guide you. The belt will need to go around any accessories it is supposed to power in your specific vehicle. Tighten the bolts and the belt. With tension on the belt applied via the alternator and pry bar, use the appropriate socket and a ratchet to tighten the two mounting bolts up the rest of the way. This will allow the alternator to keep the tension on the belt. Connect the power cable and monitor harness. Reconnect the wire harness and insert the bolt that secures the main power cable to the alternator in the same order you removed them. They should install exactly as they were in the old alternator. Reconnect the battery. With the new alternator in place, all you have left to do is reconnect the negative lead to the battery. Make sure you tighten it firmly so it can’t shake loose while driving. Item Specifics Brand : Quality_autoparts Manufacturer Part Number : Q11947001LA OE/OEM Part Number : 11369N, 11369, 104210-5390 Interchange Part Number : 10396863, 90-29-5713 Superseded Part Number : 10396863, 90-29-5713 Type : Alternator Voltage : 12V Amperage : 150A Manufacturer Warranty : 1 Year Performance Part : No Country of Origin : Unknown Finish : Painted Universal Fitment : No Vintage Part : No California Prop 65 Warning : Yes Pulley Groove Quantity : 6 Fan Type : IF Regulator Type : IR Belt Type : Serpentine Belt Pulley Class : S6 Pulley Included : Yes Decoupled Or Clutch Pulley : No Brushless : No One Wire Capable : No Plug Clock : 1 Polarity : Negative Fitment Type : Direct Replacement Pulley Type : Conventional Outside Pulley Diameter (mm) : 58 Payment Shipping Returns Contact Us Feedback Immediate payment is required during checkout. We will process and ship orders once checkout is completed. We offer international shipping through eBay global shipping program.We reserve the right to change shipping carrier and shipping method for efficient and on-time deliveries. Our store is not responsible for carrier delays such as weather or natural disasters. To receive an RMA Please contact Our Customer Service.
All returned products will be inspected. Returns processing may take up to 3 business days from the time your product is received at our return facility locations. You may Contact Us by locating the "Contact Seller" Button within a listing. We maintain high standards of excellence and strive for hundred percent customer satisfaction. Feedback is very important to us. We hope that you contact us immediately before you give neutral or negative feedback, so that we can address your concerns. It is impossible to address issues if we do not know about them! All rights reserved.


Excellent, exactly as described, great packaging, fast shipping, you saved me hundreds! Also, great communication about the item!!
Looks good haven’t installed it yet